
How about rendering your elevation data in 8 bit style? Even better: Do the rendering in a piece of software not really intended for GIS and maps! Where do I sign up?
This post shows the general work flow for rendering DEM data in the 3D suite Blender. Blender has gazillions of features and options, many of them related to modelling, which I try to avoid here. The aim is to prepare the geodata using my daily tools, FME in this case, and use Blender just for the render.
FME
The city of Gothenburg has published their DEM as open data here, so that seemed like a good place to start. I used FME to create a TIN and export it as a SHP file:
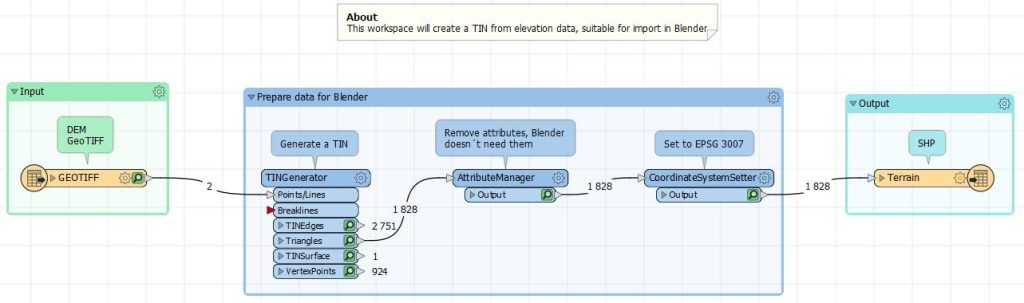
This SHP file is what Blender will import in a bit.
Blender
Coming from a GIS background, Blender seems hard is impossible to use. The main steps I used to create the images are:
- Install the BlenderGIS plugin, https://github.com/domlysz/BlenderGIS.
- If you will be working with projected data, add the desired projection in Preferences… – Add-ons – BlenderGIS. In my case, I added SWEREF 99 12 00 (EPSG 3007):
- Activate GPU rendering (Nvidia CUDA in my case): Preferences – System – CUDA
- Set the render engine to Cycles: Render – Render Engine – Cycles – Requires a decent GPU
- Import the SHP file
- Scale down the terrain
- Add a plane that will function as water
- Create a new material for the terrain
- Create a new material for the water
- Position the camera
- Adjust the lighting
- Render the scene and save the file
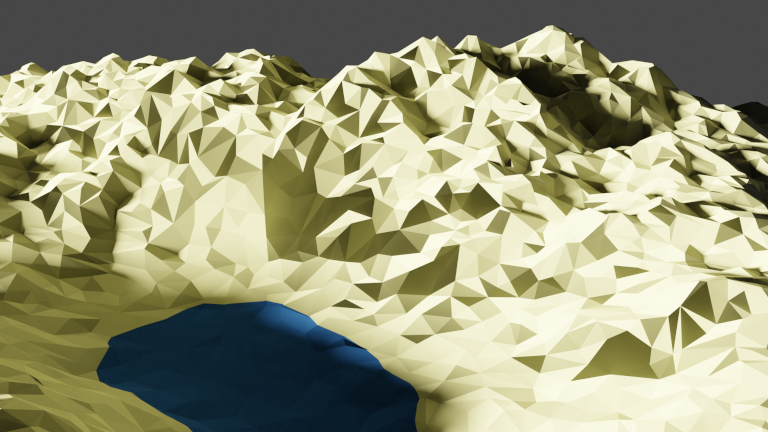
The result?
Blender is a massive piece of software, with thousands of functions menues, buttons and plugins, so it´s understandable if you feel overwhelmed when using it.